Are you encountering a leaky or inconsistent shower? You might be dealing with a defective shower valve, a crucial component responsible for regulating water flow and temperature in your bathroom. This article offers an in-depth guide to shower valve replacement, ensuring you can tackle the task with confidence and restore your shower to its optimal working condition.
When a shower valve fails, it can lead to a myriad of problems, from a persistent drip that escalates your water bill to drastic water temperature fluctuations that can turn a relaxing shower into a scalding or freezing experience. Fortunately, replacing a shower valve is a project within the reach of most do-it-yourself enthusiasts.
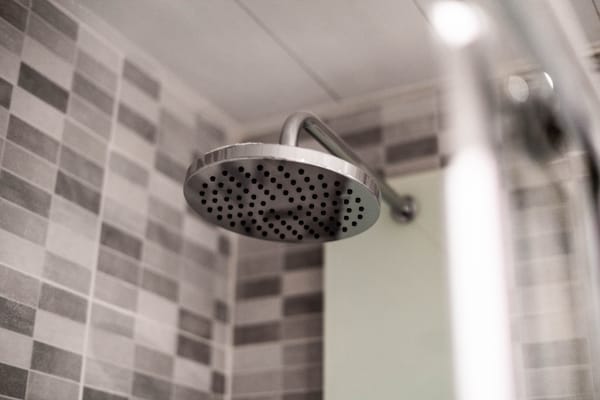
Detecting a Faulty Shower Valve
Before delving into the replacement process, it's crucial to know the signs of a faulty shower valve. These signs often include a persistent leak, inconsistent water temperature, or reduced water pressure. If you observe these problems, it's time to consider a shower valve replacement.
Selecting the Right Shower Valve
When replacing your shower valve, ensure you choose the right valve for your setup. There are various types of shower valves, each catering to different needs and shower configurations. Your choice might be dictated by factors such as the number of outlets, thermostatic controls, or concealed and exposed options. Take your time to research and pick a valve that best fits your shower system.
The Replacement Process
Here is a step-by-step guide to shower valve replacement:
1. Turn off the Water Supply
Begin by turning off the water supply to your bathroom to prevent any water mishaps during the replacement process.
2. Remove the Old Valve
Depending on your shower configuration, you may need to remove the shower handle and faceplate to access the valve. Carefully disconnect it from the water lines.
3. Install the New Valve
After removing the old valve, it's time to install the new one. Make sure it is compatible with your existing plumbing. Attach the valve to the water lines, ensuring a tight and secure connection.
4. Test the New Valve
Before you reassemble the shower handle and faceplate, turn on the water supply to test the new valve. Check for leaks and ensure that it controls the water flow and temperature as expected.
5. Reassemble the Shower
Once you are satisfied with the performance of the new valve, reassemble your shower.
Remember, while this guide provides a broad overview, your shower valve replacement process may vary depending on the specific type of valve and your plumbing system. Always consult your valve's instruction manual for more precise instructions.
Common Mistakes to Avoid
In our journey through shower valve replacement, it’s also worth highlighting common mistakes that DIYers often make and how to avoid them:
1. Choosing the Wrong Valve
As mentioned earlier, shower valves come in various types, and choosing the right one for your specific system is essential. The wrong valve can lead to compatibility issues, leading to poor performance or more leaks.
2. Not Tightening Connections Properly
Over-tightening can lead to broken seals, while under-tightening can cause leaks. Striking a balance is critical. Always follow the manufacturer's instructions.
3. Neglecting to Test Before Completion
Many people are in a hurry to complete the job and forget to test the new valve before reassembling the shower fully. Testing ensures that the valve works properly and that there are no leaks.
The Importance of Regular Maintenance
Regular maintenance of your shower valve can help prevent future malfunctions. By occasionally checking for leaks, you can catch any problems early, preventing costly water damage. Regular cleaning can also help prevent mineral buildup, which can affect your shower valve's performance over time.
Seek Professional Help if Necessary
While many can handle shower valve replacement as a DIY project, it's perfectly okay to seek professional help. If you are uncomfortable with the task or encounter complicated issues during the replacement process, don't hesitate to call a plumber.
Navigating the Intricacies of Shower Valve Replacement
Shower valve replacement is a complex process involving several components and costs, crucial to understand whether you're undertaking a DIY project or hiring a professional plumber.
The heart of your shower system is the shower valve assembly, which houses various parts that contribute to the optimal functioning of your shower. A significant element within this assembly is the shower valve cartridge. This component balances the mix of hot and cold water, ensuring your shower experience is always comfortable and safe.
Should you face issues with a persistent leaky shower faucet or inconsistent temperature control, the problem often resides in the shower valve cartridge. In such cases, a shower valve repair involving the replacement of the cartridge may be sufficient. Brands like Kohler provide reliable and durable shower valve cartridges, albeit at a higher cost.
However, in some scenarios, the issue may extend beyond the cartridge. If your shower has multiple outlets and you're facing difficulties with the water flow switching between them, the issue could lie in the shower diverter valve, another critical part of the shower valve assembly.
If the problems persist even after minor repairs, you may need to consider a complete shower valve replacement. The replacement process begins by removing the shower trim plates, which are the exterior components on the shower wall around the shower faucet. Once removed, you gain access to the faulty valve, facilitating its removal and the installation of a new shower valve.
When it comes to shower valve replacement costs, they can significantly vary. The cost of a new shower valve ranges from $150 to $350, not including labor charges if you engage a professional plumber's services. However, these costs are often justified by the long-term efficiency and water cost savings of a fully functioning shower system.
Conclusion
Shower valve replacement may seem like a complex task, but with careful planning, the right tools, and our comprehensive guide, you'll be well-equipped to handle it. Whether you're dealing with a leaky valve or want to upgrade your shower system, this DIY project can bring a sense of accomplishment and save you money in the long run.
Remember, although shower valve replacement can be a DIY project, there's no shame in hiring a professional if the task feels overwhelming or if problems arise during the process. Sometimes, getting expert help can save you from potential pitfalls and ensure a job well done.
A fully functioning shower valve is crucial for a pleasant and relaxing shower experience. By replacing a faulty valve promptly, you maintain your home's overall water efficiency and the comfort of your daily routines. So, don't delay — whether you choose the DIY route or hire a professional, ensure your shower valve is in top condition, providing you with a seamless shower experience every day.
Keeping these tips in mind and taking action when necessary will contribute to a long-lasting, efficient, and satisfying shower system. After all, there's nothing quite like the comfort and relaxation of a well-functioning shower at the start or end of your day.