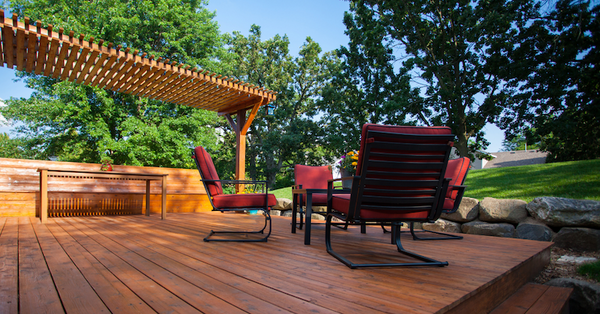
Restoring a deck can rejuvenate your outdoor living space, creating a fresh atmosphere for those sunny afternoons and starlit nights. This article aims to guide you through the process of deck restoration, providing you with the right knowledge and tips to ensure a rewarding result.
The deck is an essential part of the home, extending your living space to the outdoors and providing a gathering place for family and friends. But like any part of the house, your deck requires regular care and maintenance. Exposure to elements such as sun, rain, and snow can cause wear and tear over time, leading to faded color, splintered wood, and even structural damage.
Deck Restoration: Overview
Deck restoration involves cleaning, inspecting, repairing, and staining or painting your deck. The process is crucial not only to enhance the deck's aesthetic appeal but also to extend its life. Let's take a look at how to go about it.
Step 1: Assess the Deck Condition
Start by inspecting the deck thoroughly. Look for loose nails, rotten wood, cracks, or any signs of structural damage. Keep an eye out for mold and mildew, as they can make the deck slippery and unsafe. The extent of damage will determine whether you need to repair or replace certain sections.
Step 2: Clean the Deck
Cleaning is an essential step in restoring a deck. Use a specialized deck cleaner, readily available at your local home improvement store. These cleaners are designed to remove dirt, mildew, and weathered wood, preparing the surface for staining or painting.
Follow the manufacturer's instructions and use a brush or a power washer to clean the deck. Remember, power washers can easily damage the wood if not used correctly. Therefore, maintain a reasonable distance and keep the pressure on a lower setting to avoid any harm.
Step 3: Make Necessary Repairs
Once the deck is clean, make any necessary repairs. This may involve replacing rotten boards, tightening loose nails, or even strengthening the support structure. Always ensure that the deck is structurally sound before proceeding with aesthetic improvements.
Step 4: Stain or Paint the Deck
After cleaning and making repairs, it's time to stain or paint your deck. This not only enhances its visual appeal but also provides a protective layer against elements.
If you prefer a natural look, opt for a clear or semi-transparent stain. For a more dramatic transformation, choose a solid color stain or paint. Either way, make sure to select a product that contains UV blockers and mildewcides for enhanced protection.
Apply the stain or paint using a brush, roller, or sprayer, ensuring even coverage. Keep in mind that the deck will need 24-48 hours to dry completely before you can walk on it.
Maintenance is Key
Once you have restored your deck, regular maintenance will keep it looking great for years to come. Clean the deck at least once a year and reapply the stain or paint as needed. Keep an eye out for any signs of damage and address them promptly.
DIY vs Hiring a Professional
Restoring a deck can be a rewarding DIY project, but it's not for everyone. If you're uncomfortable with the idea of handling power tools or dealing with potential structural issues, it might be best to hire a professional. This not only ensures the job gets done correctly but also frees up your time to focus on other tasks.
However, if you're confident in your DIY skills, restoring a deck yourself can be a cost-effective option. You'll need to invest in the necessary tools and materials, but you'll save on labor costs.
Essential Tools for Deck Restoration
When embarking on the deck restoration journey, make sure you have the right tools at hand. Here's a list of essentials:
- Power washer or deck cleaning solution and a stiff brush
- Hammer and nails or deck screws
- Paintbrushes or rollers (for stain or paint application)
- Safety glasses and gloves
- Sandpaper or a power sander
Remember to choose quality materials. From the type of wood to the paint or stain, your choices will significantly impact the durability and aesthetic appeal of your deck.
What About Composite Decks?
While this article primarily addresses wood deck restoration, composite decks also require regular maintenance to stay in top shape. Although they are more resistant to rot and insects, they can still get dirty and stained.
Restoring a composite deck involves similar steps to a wood deck. You'll need to clean it thoroughly, often using a specialized composite deck cleaner. Always follow the manufacturer's instructions when cleaning and maintaining a composite deck to avoid any potential damage.
Wrap Up
A deck restoration project is an essential home improvement venture that breathes new life into your old wood deck. Whether it's a weathered cedar deck or a sturdy deck constructed with pressure-treated pine, the transformation process involves careful attention to each deck board. This ensures the entire deck regains its inviting allure, providing a safe space for bare feet during those sun-soaked afternoons.
The use of a pressure washer, deck brush, or deck stripper is crucial for preparing the deck surface, effectively removing dirt, grime, and previous stain. Follow this up with a robust deck stain that sinks into the exterior wood, accentuating the wood grain while offering robust protection. From a natural-looking semi-transparent stain to a solid stain or deck paint, the choice is yours. Remember to apply the first coat, let it dry, and then apply a second coat for optimal results.
Whether you're dealing with an old deck made of traditional wood or modern composite decking, remember to protect nearby areas with plastic sheeting before embarking on the paint or stain application process. Tools like a paint sprayer can help ensure an even application of deck paint or stain, providing a rejuvenated look to the deck surface. All these tips come together to create a successful deck restoration project, transforming your old deck into a revitalized outdoor living space.


