Tuckpointing, a centuries-old craft often overlooked, is a crucial component in the masonry world, responsible for the integrity and longevity of buildings. It plays an essential role in the upkeep of structures, whether they be historic or modern, and is an art that necessitates precision, understanding, and an appreciation of traditional building methods.
This article explores the process of tuckpointing, its importance, and how it contributes to the preservation and restoration of structures worldwide.
What is Tuckpointing?
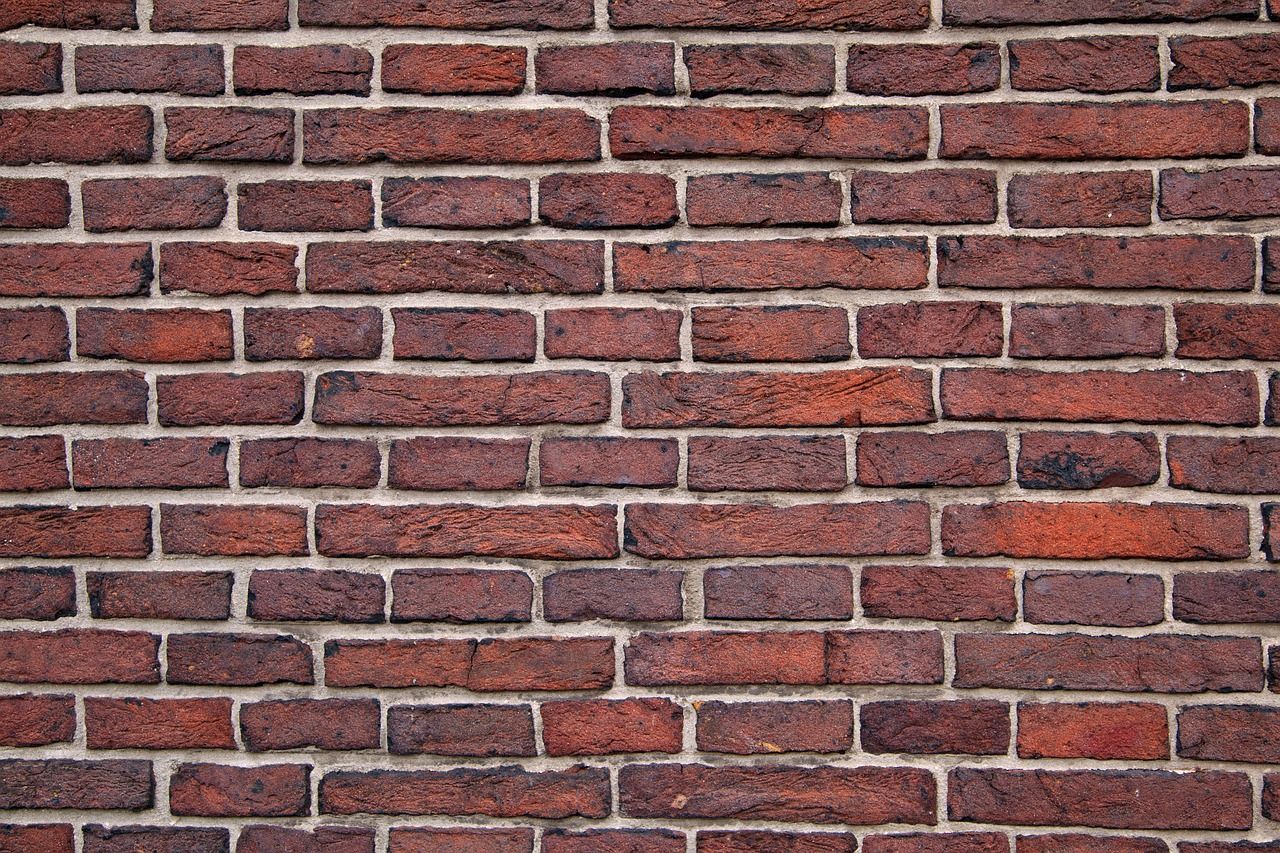
Tuckpointing is a method used in masonry construction to repair and renew mortar joints, the "lines" between bricks or stones. Over time, these joints can weather, decay, or sustain damage, weakening the overall structure. Tuckpointing involves scraping out the old, deteriorated mortar to a certain depth and then refilling these spaces with fresh mortar. The process not only provides a visually pleasing aesthetic but also safeguards the health and strength of a building.
Why is Tuckpointing Necessary?
Structural stability and integrity hinge on the well-being of the mortar joints. When the mortar starts to deteriorate, it leads to moisture penetration. This ingress of water can cause severe damage to a building, triggering a chain of destructive events. Once water infiltrates the masonry, it can lead to issues such as mold growth, accelerating the breakdown of the material.
Over time, this can also result in wood rot, particularly in wooden structures connected to or near the masonry. In extreme cases, this water damage can even compromise the structural integrity of the building, leading to potentially dangerous conditions and costly repairs.
The Tuckpointing Process
The tuckpointing process is a meticulous task that requires a keen eye and skilled hand. Although the steps may seem straightforward, each one requires precise execution to ensure the best outcome. Let's delve into the key stages of tuckpointing.
1. Mortar Removal
The first stage involves removing the old, deteriorated mortar from the joints between the bricks or stones. This step is typically performed using a grinder or a chisel and hammer, depending on the mortar's condition and the specific requirements of the building. This removal must be done carefully to avoid causing any damage to the surrounding bricks or stones.
2. Cleaning
After removing the old mortar, the joints must be cleaned thoroughly. This usually involves dusting and washing the joints to ensure a clean, firm surface for the new mortar to bond to. Cleaning also helps to remove any loose particles that could hinder the new mortar's adhesion.
3. Preparing the Mortar Mix
The new mortar must be carefully prepared to match the color and composition of the original mortar as closely as possible. This typically involves a blend of lime, sand, cement, and water. The consistency and color must be appropriate to ensure a seamless blend with the existing masonry.
4. Applying the New Mortar
The new mortar is then applied to the joints using a technique known as 'tucking' or 'pointing.' The craftsman uses a special tool, known as a tuck pointer, to press the mortar into the cleaned joints.
5. Finishing
After the new mortar has been applied, it is then shaped and smoothed to match the original style of the joints. This could be a concave, V-shape, or flush finish, depending on the structure's design. Once shaped, the mortar must be allowed to cure, a process that can take anywhere from a few days to a few weeks, depending on the weather and humidity levels.
Finding the Right Tuckpointing Professional
Given the meticulous nature of tuckpointing, it's crucial to entrust your building to a qualified professional. Look for masonry restoration experts with proven experience in tuckpointing and an understanding of the specific needs of your building type, whether it's a historic edifice or a modern brick home. Check for positive customer reviews and preferably work with licensed, insured professionals for peace of mind.
Conclusion
Horizontal Joints and Solid Mortar
When addressing existing mortar joints in a masonry wall, particularly those suffering from mortar deterioration, the process is often measured by square foot. The task of filling mortar joints is not a simple plastering job; it involves careful removal of crumbling mortar using tools such as an angle grinder. The objective is to avoid damaging the existing brick while creating enough space for the new mortar.
Once the old mortar is removed, the process of adding mortar begins. A mixture typically made of lime putty, sand, and water, known as wet mortar, is carefully tucked into both horizontal and vertical joints of the brick wall. Care should be taken to ensure that the new mortar matches the existing brick color as closely as possible. This may involve the use of brick-colored mortar or even contrasting mortar in some cases, depending on the aesthetics of the masonry units. Any excess mortar is then scraped off, leaving behind a solid, neatly filled joint.
Tuckpointing, while involving upfront costs, can be considered an investment in the longevity of your property, be it an entire wall or the entire house. Tuckpointing cost varies depending on the complexity of the task and the condition of the existing mortar joints. However, the result is invariably a stronger, more weather-resistant structure, repairing mortar joints and restoring the original beauty of your masonry wall. Tuckpointing breathes new life into your property, extending its lifespan and enhancing its aesthetic appeal.