As a homeowner or a passionate DIY enthusiast, your walls' aesthetic can be one of your top priorities. A popular choice for wall texturing is the Orange Peel Texture—a technique that gets its name from its resemblance to the skin of an orange.
This article aims to give you an understanding of what this texture is, its benefits, and how you can master it at home.
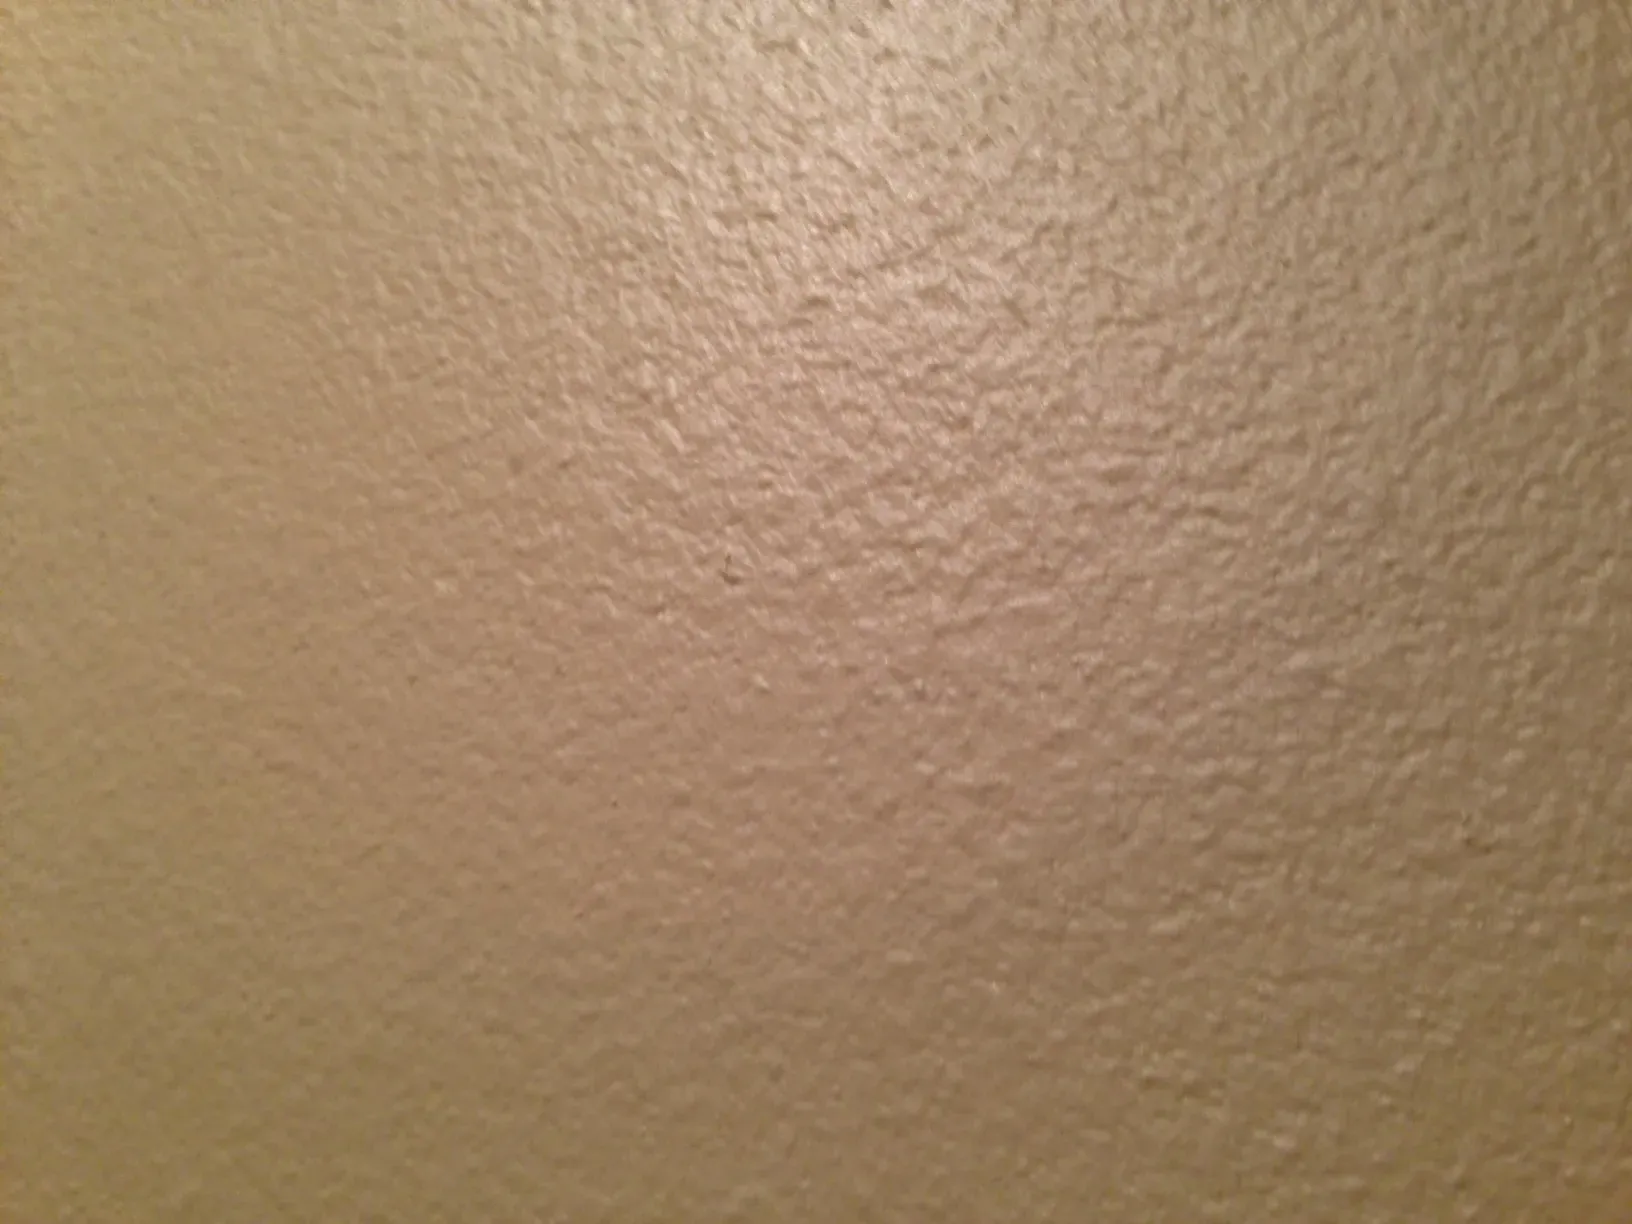
What is Orange Peel Texture?
Orange peel texture is a type of wall texture that creates a finish similar to the skin of an orange. Unlike popcorn or knockdown textures, orange peel imparts a subtle, yet visually appealing surface to your walls.
The texture is sprayed onto the surface and left to dry, forming a lightly bumpy, yet consistent finish. Orange peel texture can give your home a contemporary look and is more cost-effective than other texturing methods.
Benefits of Orange Peel Texture
Aside from the unique aesthetic appeal, the orange peel texture has a variety of other benefits.
1. Versatility
The texture works well in all rooms and can be applied to both walls and ceilings. It's an excellent choice for homeowners who want to maintain a consistent look throughout their home.
2. Concealment
The texture can help hide imperfections in the drywall, including small cracks, nails, or tape seams.
3. Durable
Unlike more substantial textures like popcorn, orange peel texture is less likely to chip or crack over time.
4. Cost-Effective
Since it requires less material than heavier textures, it's a more economical choice.
Mastering the Orange Peel Texture at Home
The application of orange peel texture can be a DIY project with the right tools and a bit of patience. Here are step-by-step instructions to guide you in achieving the perfect orange peel texture at home.
1. Gather your Tools and Materials
You'll need joint compound, a hopper gun, and an air compressor. You might also need a ladder for higher areas, plastic or drop cloths to protect your floors, and painter's tape for any surfaces you don't want to texture.
2. Prep the Room
Cover all the floors and furniture with plastic or drop cloths and use the painter's tape to protect windows, doors, and trim.
3. Prepare the Joint Compound
Mix the joint compound with water until it reaches the consistency of pancake batter.
4. Set up the Hopper Gun
Fill the hopper gun with the joint compound mixture, then connect it to the air compressor. Set the air pressure to about 25 psi, and use a small nozzle for a finer texture.
5. Apply the Texture
Spray the mixture onto the walls, moving the gun in smooth, sweeping motions. The technique may take a little practice, so consider starting in an inconspicuous area.
6. Let it Dry and Paint
Once the texture has completely dried (usually 24-48 hours), you can apply primer and paint as desired.
Achieving the Best Results with Orange Peel Texture
To ensure that your orange peel texture project turns out as perfect as possible, here are some essential tips and common pitfalls to avoid.
1. Achieve the right Consistency
The consistency of the mixture is crucial in achieving the desired texture. If the mixture is too thick, it will be difficult to spray and won't create the right texture. Conversely, if it's too thin, it won't adhere to the wall properly. Practice on a piece of scrap drywall until you achieve the perfect consistency.
2. Practice your Technique
The way you spray the mixture onto the wall plays a significant role in the outcome. Start by practicing on a piece of cardboard or scrap drywall to get the hang of the technique. Keep the gun moving in smooth, sweeping motions to ensure even coverage.
3. Don’t Rush the Drying Process
After the texture is applied, it's essential to let it dry completely before painting. If the texture isn't fully dried, the paint may not adhere properly, and it can also alter the texture.
4. Invest in Quality Tools
While it can be tempting to save money on tools, investing in a high-quality hopper gun and air compressor can make a big difference in the final result.
Environmental Considerations and Cleanup
As we strive to make our homes more visually appealing with techniques like orange peel texturing, it's equally important to consider the environmental impact and the cleanup process.
1. Eco-friendly Options
In today's market, there are numerous eco-friendly joint compounds available. These alternatives have less impact on the environment and are safer for your health. While they may cost a bit more, the benefits they provide outweigh the extra expense.
2. Proper Cleanup
Cleaning up after applying an orange peel texture is crucial. Dispose of any leftover mixture properly according to your local waste management guidelines. Never pour it down the drain as it can clog your pipes.
3. Recycle
If you've used any plastic or paper during the application process, make sure to recycle them appropriately. Every small step towards sustainability counts.
Professional Help
While applying orange peel texture can be a DIY project, don't hesitate to reach out to professionals if you're not comfortable doing it yourself. They have the right skills and experience to deliver a seamless finish.
In conclusion, the orange peel texture not only elevates your home's aesthetic appeal but also offers a durable, cost-effective solution to conceal imperfections. With the right tools, practice, patience, and eco-friendly practices, you can transform your living space into an elegant masterpiece.
Conclusion
Apply Orange Peel Texture for Textured Wall
The beauty of an orange peel drywall texture lies in its subtly and versatility. Unlike more assertive finishes such as popcorn ceiling texture or knockdown texture, the orange peel wall texture brings an understated elegance to any room. It's versatile enough to complement various interior styles while adding a pleasing tactile quality to your wall surfaces.
If you decide to transform your textured walls, the process to remove orange peel texture is relatively straightforward with the help of the right tools and techniques. Using a solution of water and drywall mud, a thin skim coat can be applied to smoothen the surface. Once the skim coat dries, sand it down for a smooth finish, ready for priming and painting. It's important to protect your floors and furniture using plastic drop cloths during this process.
The application process for orange peel textures, while seemingly intimidating, can be accomplished with patience and practice. A mixture of drywall compound or "mud" is sprayed onto the ceiling or wall surface using a hopper gun, creating a finish somewhere between a popcorn ceiling texture and a knockdown texture. Out of all the ceiling textures, the orange peel offers a balance between visual interest and ease of application, lending an attractive quality to any room. The drywall texture you choose can significantly impact your space, transforming it from a basic, flat surface to a visually engaging one.